How to Microneedle at Home Safely With Dr. Pen: A Comprehensive Guide
If you're looking for a way to improve the appearance of your skin, you may have considered microneedling. There are two common forms of microneedling such as derma rollers and micro-pens. Derma rollers like MTS Derma Roller are more common for at-home treatments, and micro-pens like Dr. Pen microneedling pen are more commonly done in-office. With micro-pens now available to end-users, many opt to do these at home to avoid expensive treatment costs. With that said, safety should always come first. This comprehensive guide will cover how to safely microneedle at home with a microneedling pen for the best results.
What Is Microneedling?
Microneedling is used to boost the production of new collagen by creating microscopic injuries to the skin by puncturing it with tiny needles. This procedure will boost the skin's natural healing process by encouraging new collagen production. Collagen is a protein that serves as one of the main building blocks for your bones, skin, hair, muscles, tendons, and ligaments. Collagen keeps our skin from sagging, giving us that plump, youthful look.
What Is A Microneedling Pen?
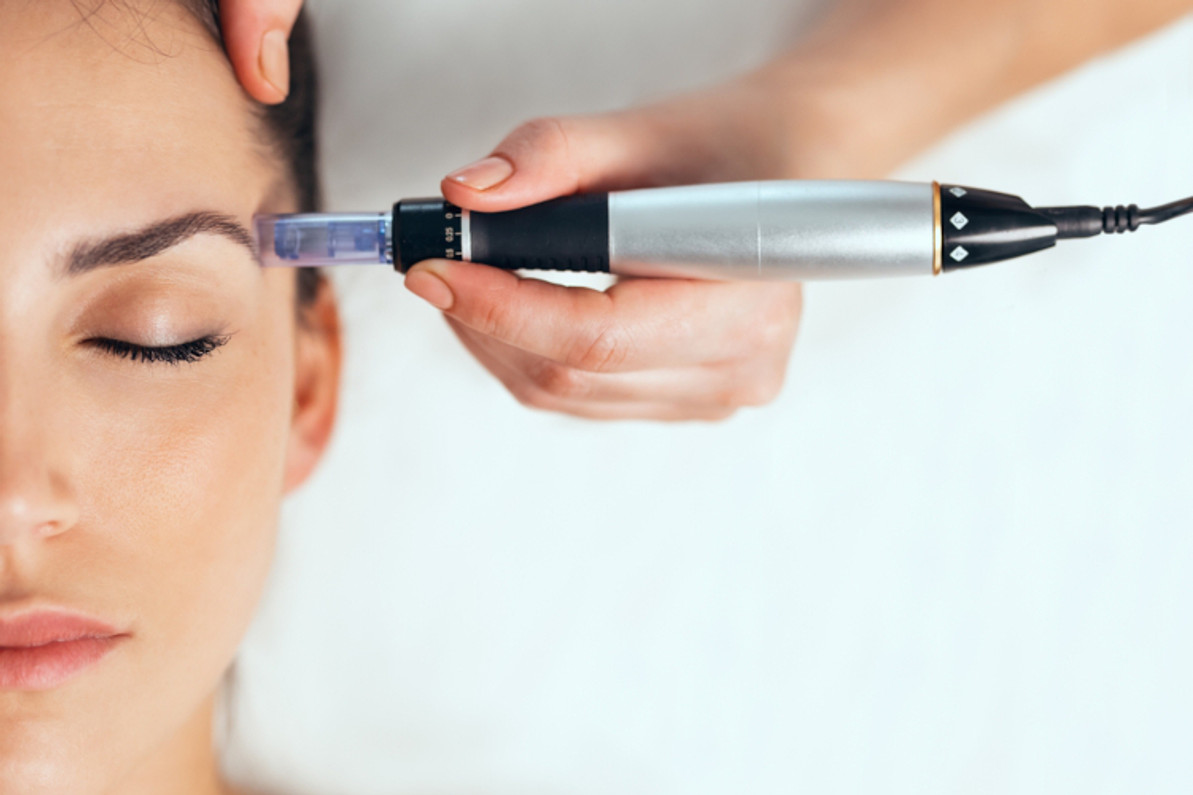
A microneedling pen is a pen-like device that uses replaceable needle cartridges to create needle size punctures. Some features that should be considered when looking for a microneedling pen are speed, penetration depth, power, and pins per cartridge.
Benefits Of Microneedling
- Treats scars (acne, surgical, burns)
- Improves wrinkles and fine lines
- Shrinks enlarged pores
- Helps tattoo removal process
- Treats stretch marks
- Brightens complexion
- Evens skin tone
- Promotes hair growth
- Improves production of collagen and elastin
- Firms and tightens skin
Steps To Microneedle At Home With Microneedling Pen
Step 1: Prep The Skin
Preparing the skin properly is an important step to minimize the risk of infection, discomfort, and how smoothly the microneedling device glides.
Cleanse - Washing the face removes dirt, oil, makeup, and other impurities that may cause infection.
Apply numbing cream - Using a numbing cream is optional. Depending on how deep the needle setting is, numbing will significantly reduce the discomfort during the procedure. If using numbing cream, use one with at least 5% lidocaine. Leave it on for 20 minutes, then cleanse the treatment area again. Use 60% alcohol mixed with purified water or 0.1 chlorhexidine to wipe off any remaining numbing cream. Removing the numbing cream ensures it won't enter the microchannels you create during your treatment.
Step 2: Prepare The Area And Device
Make sure the working area and device is sterilized. Keep alcohol nearby to use if necessary to prevent cross-contamination.
Make sure microneedling device is fully charged or plugged in. Then, open a new cartridge and attach it to your device. Do not touch the tip of the needles or reuse cartridges to minimize the possibility of infection and ensure they are sterile.
Step 3: Microneedling
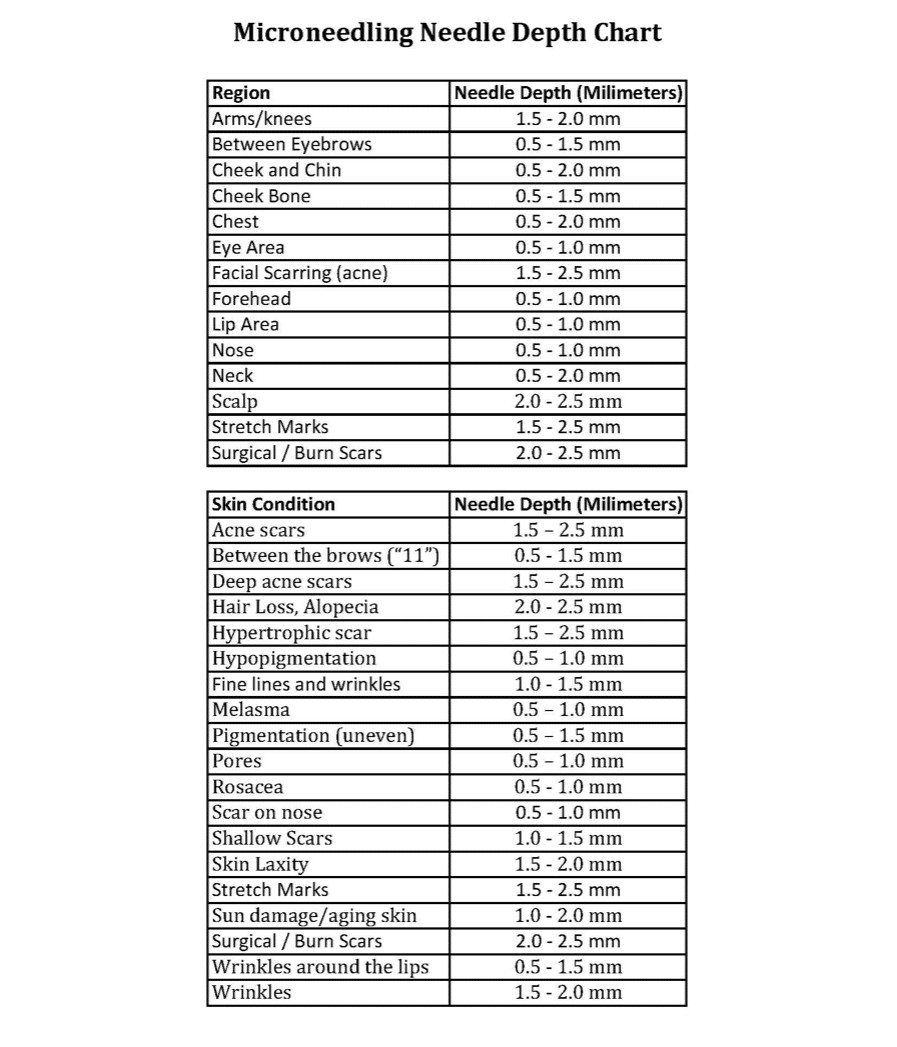
Select needle depth - The needle depth you select depends on what skin issues you are treating. Needle depth ranges from 0 mm - 3 mm. Refer to the chart below to determine the proper needle depth.

Apply serum - Using a hyaluronic acid or hydrating serum helps the device to move more smoothly on the skin to prevent dragging.
Technique - Once the serum has been applied, work in a grid to better track which area has been passed over with a the pen. Move the pen in a pattern working vertical, horizontal, then diagonal in both directions. When working on the body, avoid microneedling on the bony part.
Step 4: Post Needling
It is normal for the skin to be red, swollen, or pinpoint bleeding after the procedure. The face can be washed with water, and hyaluronic acid can be applied to hydrate and calm skin. Avoid getting sweaty or applying makeup 24 hours post-treatment to avoid irritation. Use sunscreen if you're going to be exposed to the sun.
Step 5: Microneedling After-Care
After 24 hours of microneedling, a gentle cleanser can be used. Avoid using products that can irritate the skin, such as retinol, vitamin C, acids, or scrubs. The skin may be swollen, peeling, bruising, and flakey. Use a moisturizer to minimize dryness and feeling tightness.
After 48 hours of microneedling, continue to cleanse with a gentle cleanser. At this stage, you can gently exfoliate with a washcloth to remove flakey skin if it is not feeling sensitive. Continue to keep skin hydrated with moisturizer.
Three to five days after microneedling, keep skin protected from the sun by applying sunscreen. Avoid irritants such as scrubs, acids, and toners.
Downtime is often minimal after a microneedling treatment. Normal skincare routine can generally be resumed after seven days.
Recent Posts
-
Best Under-Eye Bags Cream and Treatment
Best Under-Eye Bags Cream and Treatment Do you have the dreaded under-eye bags that make you lo …Apr 14th 2025 -
Rice Water for Skin Benefits
Rice Water for Skin Benefits Rice water for skin has become a viral beauty trend that is suppos …Apr 4th 2025 -
Natural Remedies for Anxiety
Natural Remedies for Anxiety Everyone experiences anxiety symptoms every now and then. We live …Mar 28th 2025


